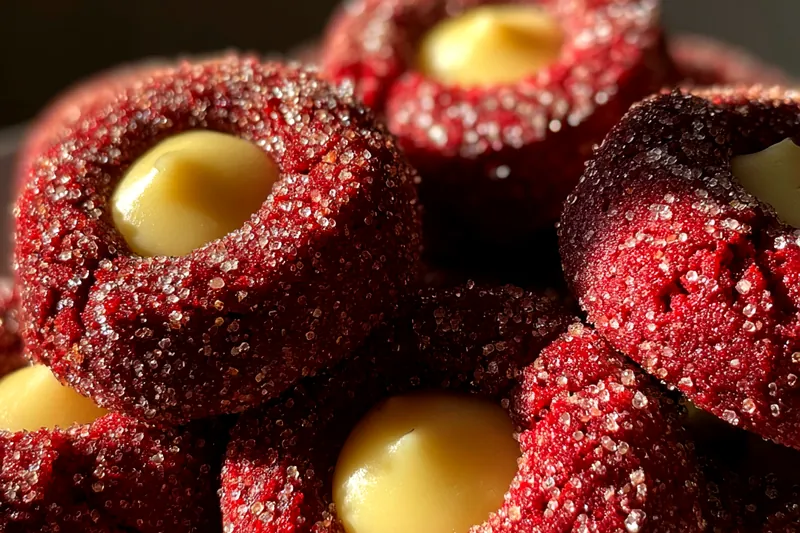
Red Velvet Thumbprints
Red Velvet Thumbprints are a delightful twist on the classic thumbprint cookie. With their vibrant color and rich flavor, they make for a perfect dessert at any occasion. These cookies are easy to make and feature a creamy filling that perfectly complements the soft, chocolatey dough. Impress your guests or treat yourself with these indulgent treats!


Why This Red Velvet Thumbprints Recipe Works
This recipe for Red Velvet Thumbprints stands out due to its perfect balance of rich cocoa and vibrant red color. The thumbprint shape not only makes them visually appealing but also allows for a generous amount of creamy filling, enhancing the overall flavor. The combination of textures, from the soft cookie to the smooth filling, makes each bite a delight.
The technique of creating a well in the cookie dough ensures that the filling stays in place while baking. This method also allows the cookies to maintain their shape and softness. With careful attention to ingredient quality and baking times, you can achieve perfect results every time.
💡 Professional Tip
For the best texture and flavor, always use room temperature ingredients, especially butter and cream cheese. This helps to create a smooth batter that will incorporate air effectively during mixing, giving your cookies a light and airy texture. Additionally, don’t overmix the dough after adding the dry ingredients, as it can lead to tough cookies.
Frequently Asked Questions
Yes, you can prepare the cookie dough in advance and store it in the refrigerator for up to 48 hours. Just be sure to let it come to room temperature before baking. You can also bake the cookies and store them in an airtight container for several days. Fill them with the cream cheese mixture just before serving for the best flavor.
If you're looking for a substitute for cream cheese in the filling, you can use mascarpone cheese or ricotta cheese mixed with a little powdered sugar to achieve a similar texture. Greek yogurt can also work, but it will give a tangier flavor. Be sure to adjust the sweetness to your liking.
The cookies are done when the edges are set and the centers are slightly soft. They will continue to firm up as they cool. A good way to test is to gently press the surface; if it springs back, they are ready. Avoid overbaking to maintain a soft texture.
Absolutely! You can freeze the baked cookies without the filling for up to three months. To do this, place them in a single layer on a baking sheet, freeze until solid, then transfer them to an airtight container or freezer bag. When ready to enjoy, simply thaw and fill with the cream cheese mixture.
These delicious cookies pair wonderfully with a cup of coffee or hot cocoa. For a festive touch, serve them alongside other holiday treats like peppermint bark or spiced cider. They also make a great addition to dessert platters at parties.
Stored in an airtight container, Red Velvet Thumbprints will last for about 5-7 days in the refrigerator. To maintain their freshness, it’s best to keep them filled with the cream cheese mixture for no longer than 2 days. If you have leftover filling, store it separately in the fridge.
Yes, you can prepare the cookie dough ahead of time and keep it in the fridge. You can also bake the cookies and store them in an airtight container. However, for the freshest flavor and texture, it’s best to fill them with the cream cheese mixture right before serving.
If you want to enjoy your Red Velvet Thumbprints warm, you can reheat them in the oven at a low temperature (around 300°F or 150°C) for about 5-10 minutes. Be careful not to overheat them, as this can dry them out. The filling should be enjoyed fresh, so it's best to add it after reheating.
Recipe Troubleshooting Guide
Too Dry
Problem: If your cookies turn out dry, it may be due to overbaking or incorrect ingredient measurements.
Solution: To prevent this, always measure flour accurately and check your cookies a minute or two before the recommended baking time is up. Remove them from the oven as soon as the edges are set.
Not Crispy Enough
Problem: If your cookies are soft and not crispy, it could be due to insufficient baking time.
Solution: Make sure to bake the cookies long enough until the edges are set. For crispier cookies, you can slightly increase the baking time by a couple of minutes, but watch them closely to avoid burning.
Overcooked
Problem: Overcooked cookies may become hard and lose their soft texture.
Prevention: To prevent overcooking, always set a timer and check for doneness a couple of minutes early. If you find that your cookies are overcooked, consider using them for a dessert crumble or pairing them with ice cream.
Undercooked Center
Problem: If the center of your cookies is undercooked, they may collapse or be doughy.
Recovery: To recover, return the cookies to the oven for a few minutes. Next time, ensure the cookies are spaced properly on the baking sheet to allow for even baking.
Burnt Exterior
Problem: Burnt cookies often occur if the oven temperature is too high or if they are left in too long.
Prevention: To prevent burning, always preheat your oven accurately and consider using an oven thermometer for precise temperature control. Check for doneness regularly.
Flavor Balance
Too Sweet: If the cookies are too sweet, try adding a pinch of salt to balance the flavors or reduce the sugar next time.
Too Salty: For cookies that are too salty, consider reducing the amount of salt in the recipe or using unsalted butter.
Bland: If your cookies lack flavor, enhance them by adding a splash of vanilla or almond extract to the dough.
Essential Ingredients for Red Velvet Thumbprints
The key ingredients for Red Velvet Thumbprints include all-purpose flour, cocoa powder, and red food coloring, which give these cookies their signature color and flavor. The cream cheese filling adds a rich and tangy contrast to the sweet, chocolatey base. Using high-quality ingredients ensures the best taste and texture.
It’s important to use fresh ingredients, particularly the baking soda and the cocoa powder, as they directly affect the cookies' rise and flavor. Opt for natural cocoa powder for a deeper chocolate flavor. Fresh eggs and real vanilla extract also enhance the overall taste of these delicious cookies.
Essential Ingredient Notes
- All-Purpose Flour: Using all-purpose flour provides the right balance of structure and tenderness for these cookies. Avoid overmeasuring, as too much flour can lead to dense cookies. Spoon the flour into the measuring cup and level it off for accuracy.
- Red Food Coloring: To achieve that classic red velvet color, use a high-quality red food coloring. Gel food coloring is recommended, as it provides a vibrant hue without adding extra liquid to the batter. Adjust the amount based on your desired shade!
- Cream Cheese: Always use full-fat cream cheese for the filling to ensure a rich and creamy texture. Make sure it’s softened to room temperature before mixing to achieve a smooth consistency without lumps.

Step-by-Step Cooking Process
Making Red Velvet Thumbprints is a straightforward process that involves mixing the dough, shaping it into balls, and pressing your thumb into each to create a well for the filling. This method not only makes the cookies visually appealing but also ensures a perfect ratio of cookie to filling.
Pay attention to the baking time to achieve the right texture; the edges should be set while the center remains soft. Enjoy the satisfaction of creating beautiful cookies that are sure to impress your guests with their stunning color and delightful flavor.
Key Technique for Perfect Red Velvet Thumbprints
The most important technique for making perfect Red Velvet Thumbprints is ensuring the dough is not overmixed. Overmixing can develop the gluten, leading to tough cookies. Mix until just combined for the best soft texture. Additionally, using a light touch when pressing your thumb into the cookie dough helps maintain their shape.
Red Velvet Thumbprints
📋 Ingredients
Main Ingredients
- 1 cup butterRoom temperature
- 2 cups sugarGranulated
- 1 teaspoon vanilla extractPure
- 1/2 teaspoon saltKosher salt
- 8 oz cream cheeseSoftened
For the Filling
- 2 cups all-purpose flourFor the dough
- 1 cup granulated sugarSweetens the dough
- 1/2 cup unsweetened cocoa powderAdds chocolate flavor
- 1 teaspoon baking sodaLeavening agent
- 1/2 teaspoon saltEnhances flavor
- 1 tablespoon red food coloringGives the cookies their color
- 1 teaspoon vanilla extractFor flavor
- 1/2 cup unsalted butterSoftened
- 1 large eggBinds the dough
Instructions
Preheat Oven
Preheat your oven to 350°F (175°C) and line a baking sheet with parchment paper.
Mix Dry Ingredients
In a large bowl, combine the flour, cocoa powder, baking soda, and salt. Whisk together until well combined.
Cream Butter and Sugar
In another bowl, beat the softened butter and granulated sugar together until light and fluffy.
Add Wet Ingredients
Add the egg, vanilla extract, and red food coloring to the butter mixture and continue to beat until well combined.
Combine Mixtures
Gradually add the dry ingredients to the wet ingredients, mixing until just combined.
Shape Cookies
Scoop tablespoons of dough and roll them into balls. Place them on the prepared baking sheet, spacing them apart.
Make Thumbprints
Using your thumb, press down in the center of each dough ball to create a well for the filling.
Bake Cookies
Bake in the preheated oven for 12-15 minutes. Allow to cool on the baking sheet for a few minutes before transferring to a wire rack.
Prepare Filling
In a small bowl, beat the cream cheese, powdered sugar, and vanilla extract together until smooth.
Fill Cookies
Once the cookies are cool, fill each thumbprint with the cream cheese mixture.
Recipe Notes & Tips
Storage Tips
To keep your Red Velvet Thumbprints fresh, store them in an airtight container at room temperature for 3-5 days or refrigerate for up to a week. For longer storage, consider freezing the baked cookies without the filling.
Serving Suggestions
Serve Red Velvet Thumbprints on a decorative platter for gatherings, or individually wrapped for a sweet take-home treat. Pair them with coffee, tea, or a glass of milk for a delightful experience.
Recipe Variations
For a twist on the classic, try adding chopped nuts to the dough or filling. You can also substitute white chocolate for the cream cheese filling for a sweeter alternative. Experimenting with different flavor extracts can also create unique variations!