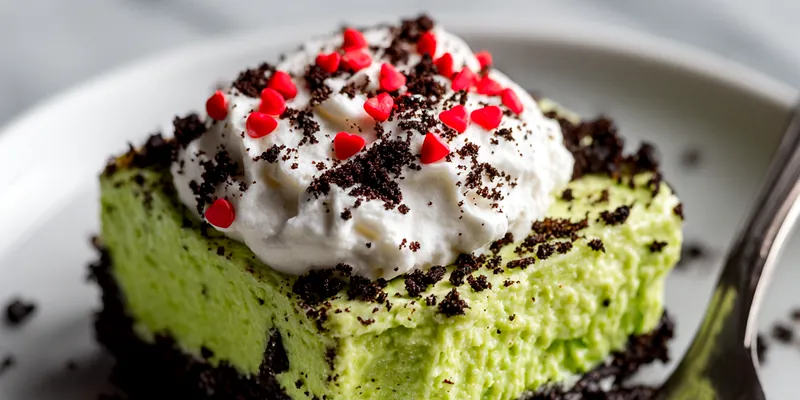
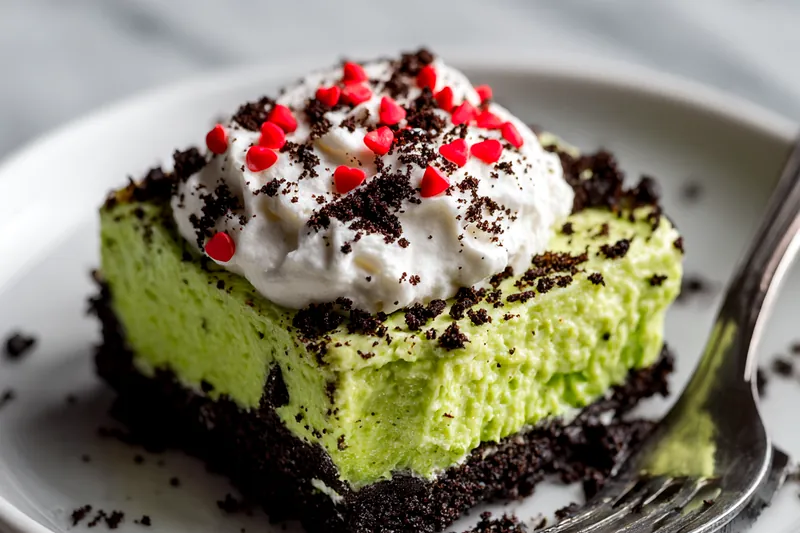
No-Bake Pistachio Lush Layers
This nostalgic Pistachio Lush is the ultimate crowd-pleaser. With four delicious layers of chocolate, sweet cream, and nutty pistachio pudding, it's a cool and creamy treat that requires absolutely no baking.

Why This Recipe Works
The contrast in textures is what makes this dessert special. You get the crunchy, buttery chocolate base against the ultra-smooth cream cheese layer and the airy pudding mousse. It strikes the perfect balance between rich and light.
Using instant pudding ensures the dessert sets up firm enough to slice beautifully, while the addition of a cream cheese layer adds a tangy depth that prevents the dessert from being overwhelmingly sweet.
💡 Professional Tip
For the cleanest slices, freeze the dessert for about 30-45 minutes before cutting. Wipe your knife with a warm, damp cloth between each cut to keep the layers distinct.
Frequently Asked Questions
Absolutely! In fact, it's better if made a day in advance. It keeps well in the refrigerator for up to 3-4 days.
Yes, you can whip 3 cups of heavy cream with a little powdered sugar and vanilla. Use half for the filling and half for the topping. Note that real cream may soften faster at room temperature.
Yes, a graham cracker crust or a Golden Oreo crust works beautifully if you prefer a vanilla flavor profile over chocolate.
While pistachio is classic for 'Lush' desserts, you can easily swap it for chocolate, vanilla, or even lemon pudding mix for a different flavor variation.
Ensure you used Instant Pudding, not Cook & Serve. Also, do not use soy or almond milk as they often don't set correctly with instant pudding mix.
Yes! This dessert freezes very well. You can serve it frozen like an ice cream cake, or let it thaw in the fridge before serving.
Place the cookies (filling and all) in a food processor and pulse until fine crumbs form. Alternatively, place them in a zip-top bag and crush with a rolling pin.
A 9x13 inch glass or ceramic baking dish is ideal. You can use an 8x8 pan for thicker layers, but you may have leftover filling.
Recipe Troubleshooting Guide
Crust Crumbling
Problem: The crust falls apart when serving
Solution: Ensure you used enough butter and pressed it down very firmly. Chilling the crust before adding the filling helps it bind.
Layers Mixing
Problem: The layers are bleeding into each other
Solution: Make sure each layer is spread gently. Dollop the filling over the surface rather than dumping it in one spot, then gently connect the dollops.
Too Soft to Cut
Problem: Dessert is messy when sliced
Prevention: It likely hasn't chilled long enough. It needs at least 4 hours. Quick fix: Pop it in the freezer for 30 minutes.
Lumpy Filling
Problem: Cream cheese layer has white lumps
Recovery: The cream cheese must be completely room temperature before beating. If it's cold, it won't blend smoothly with the sugar.
Soggy Crust
Problem: Bottom layer is wet
Prevention: Don't skip the step of chilling the crust first. Also, ensure the pudding layer is thick before adding it so liquid doesn't seep down.
Flavor Adjustments
Too Sweet: Use a pinch of salt in the crust mixture
Too Salty: N/A - this is a sweet dessert
Bland: Add a drop of almond extract to the pudding layer to enhance the pistachio flavor

Ingredient Spotlight
The star of this show is the Instant Pistachio Pudding. It provides that iconic pastel green color and a unique nutty flavor that pairs unexpectedly well with chocolate. Look for boxes labeled 'Instant' rather than 'Cook & Serve' for the correct texture.
For the crust, we use the entire chocolate sandwich cookie—filling included. The cream center adds sweetness and helps bind the crust together along with the butter, creating a solid foundation that holds up the creamy layers above.
Essential Ingredient Notes
- Cream Cheese: Use full-fat brick cream cheese for the best structure. Tub cream cheese is too soft and whipped, which can make the layers unstable.
- Whipped Topping: Thaw frozen whipped topping in the fridge overnight. Do not microwave it to thaw, or it will become watery and ruin the texture.
- Milk: Whole milk creates the richest pudding, but 2% works well too. Avoid skim milk for the best set.
Mastering the Layers
Patience is key when constructing this dessert. While it requires no baking, rushing the layering process can lead to a messy presentation. Taking the time to spread each layer edge-to-edge ensures that every bite contains all the flavors.
The 'Lush' family of desserts relies on the chill time. The refrigerator does the work of 'cooking' the dish by setting the gelatin and fats. Don't pull it out too early, or the squares won't hold their shape on the plate.
The Offset Spatula
Use an offset spatula to spread the layers. Its angled shape allows you to smooth the filling into the corners of the dish without dragging your knuckles through the cream.
No-Bake Pistachio Lush Layers
📋 Ingredients
Crust & Cream Cheese Layer
- 2 pkgs (3.4oz) instant pistachio puddingProvides flavor and green color
- 710ml cold milkTo activate the pudding
- 1 container (8oz) Cool WhipFor the fluffy top layer
- Heart sprinklesFestive garnish
- Crushed OreosFor garnish texture
Pudding Layer & Topping
- 300g Oreos, crushedInclude filling for the crust
- 115g unsalted butter, meltedBinds the crust
- 225g cream cheese, softenedBase for the cheesecake layer
- 120g powdered sugarSweetens the cream cheese
- 1 container (8oz) Cool WhipFolded into cream cheese
Instructions
Prepare Crust
Combine crushed chocolate cookies and melted butter in a bowl. Press the mixture firmly into the bottom of a 9x13 inch baking dish to form an even crust. Chill in the refrigerator/freezer while preparing the next layer.
Make Cream Layer
In a medium bowl, beat the softened cream cheese and powdered sugar until smooth and creamy. Fold in 1 container (8 oz) of the whipped topping. Spread this mixture carefully over the chilled crust.
Make Pudding Layer
In a large bowl, whisk together the instant pistachio pudding mix and cold milk for about 2 minutes until it begins to thicken. Let it sit for 3 minutes, then spread it evenly over the cream cheese layer.
Top and Chill
Spread the remaining container of whipped topping over the pudding layer. Sprinkle with crushed chocolate cookies and red heart sprinkles.
Set and Serve
Cover and refrigerate for at least 4 hours (or overnight) to allow the layers to set before slicing into squares.
Recipe Notes & Tips
Storage
Keep loosely covered with plastic wrap or in an airtight container in the refrigerator for up to 4 days. Do not leave out at room temperature for longer than 30 minutes due to the dairy content.
Serving Suggestions
Serve chilled. Pair with a hot cup of coffee to contrast the cold, creamy texture. Add extra crushed nuts on top for more crunch.
Garnish Variations
Swap heart sprinkles for chopped pistachios, chocolate curls, or maraschino cherries depending on the season and occasion.