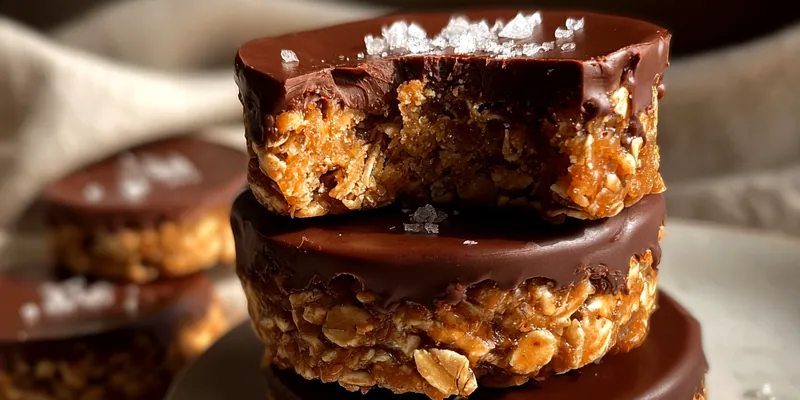
No-Bake Chocolate Oat Cups
No-Bake Chocolate Oat Cups are the perfect combination of health and indulgence. Made with wholesome ingredients, these cups are quick to prepare and require no baking. They make an excellent snack or dessert for any chocolate lover. Enjoy a guilt-free treat that satisfies your cravings!

Why This No-Bake Chocolate Oat Cups Recipe Works
These No-Bake Chocolate Oat Cups are not only easy to make but also packed with nutritious ingredients. The combination of oats, almond butter, and dark chocolate provides a satisfying texture and flavor. Plus, they're customizable based on your favorite add-ins like nuts or dried fruit.
The technique of mixing wet and dry ingredients separately ensures a consistent texture throughout the cups. Allowing them to chill in the fridge helps them hold their shape, making them perfect for snacking or as a healthy dessert option.
💡 Professional Tip
For the best flavor, use high-quality dark chocolate and natural nut butter. You can adjust the level of sweetness by adding more or less honey or maple syrup based on your preference.
Frequently Asked Questions
Absolutely! You can prepare these cups a few days in advance and store them in an airtight container in the fridge. This makes them a perfect grab-and-go snack for busy days.
If you're allergic to nuts, you can substitute almond butter with sunflower seed butter or pumpkin seed butter. Both options will give you a similar texture while keeping the recipe nut-free.
These cups are done when they are firm to the touch and hold their shape after being chilled in the refrigerator. You can gently press them to test their firmness before serving.
Yes, you can freeze these cups! Just make sure to wrap them individually or use an airtight container. They can be stored in the freezer for up to three months. Just let them thaw in the fridge before enjoying.
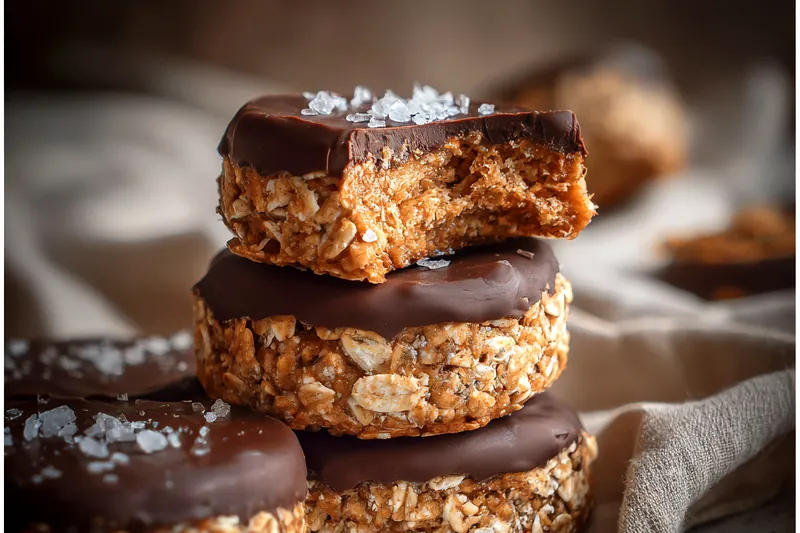
These cups can be served on their own or with a dollop of yogurt for added creaminess. Fresh fruit like bananas or berries also complement the chocolate nicely.
In the fridge, these cups can last up to one week when stored in an airtight container. Just make sure they are fully set before storing.
Yes, these cups are perfect for making ahead of time. Just follow the recipe, chill them, and they will be ready to enjoy whenever you need a quick snack.
Since these cups are no-bake, they are best enjoyed cold or at room temperature. If you prefer them warm, you can microwave them for a few seconds, but be cautious not to melt the chocolate too much.
Recipe Troubleshooting Guide
Too Dry
Problem: The oat cups may end up too dry and crumbly.
Solution: If this happens, try adding a little more almond butter or a splash of milk to the mixture to help bind the ingredients better.
Not Crispy Enough
Problem: The oat cups might not have the desired crispness.
Solution: Ensure that the oats are well mixed with the other ingredients, and consider adding more nuts or coconut flakes for extra crunch.
Overcooked
Problem: While these are no-bake, mishandling can lead to a mushy texture.
Prevention: Be sure to chill them just long enough to set without over mixing the ingredients, which can lead to a dense final product.
Undercooked Center
Problem: The centers of the cups may remain too soft.
Recovery: If this occurs, return them to the refrigerator for additional chilling time until they firm up nicely.
Burnt Exterior
Problem: Though these are no-bake, improper handling can lead to excess melting.
Prevention: Always use room temperature ingredients and avoid excessive heat during preparation to prevent unwanted melting.
Flavor Balance
Too Sweet: If the cups are too sweet, consider adding a pinch of salt or a teaspoon of unsweetened cocoa powder to balance it out.
Too Salty: If they taste too salty, you can add a bit more almond butter or oats to dilute the saltiness.
Bland: If the flavor is too bland, adding a splash of vanilla extract or a bit more honey can enhance the overall taste.
Essential Ingredients for No-Bake Chocolate Oat Cups
The key ingredients for these oat cups include rolled oats, which provide the foundational texture, and almond butter, offering creaminess and flavor. Cocoa powder adds the much-loved chocolatey goodness, while honey or maple syrup serves as the sweetener.
Using high-quality ingredients will elevate the flavor of your oat cups. Opt for organic oats and natural almond butter without added sugars for the best results.
Essential Ingredient Notes
- Rolled Oats: Choose old-fashioned rolled oats for the best texture. Quick oats can become too mushy, while steel-cut oats won't bind as well.
- Cocoa Powder: Use unsweetened cocoa powder for a rich chocolate flavor without added sugars, allowing you to control the sweetness of your cups.
- Almond Butter: Look for creamy, natural almond butter without added oils or sugars. This will ensure a smooth mixture that holds together well.

Step-by-Step Cooking Process
This no-bake recipe is straightforward and can be completed in just a few simple steps. Mixing the ingredients properly and chilling them allows for easy assembly and a delicious final product.
Achieving perfect results relies on the right ratio of ingredients. Make sure to pack the mixture tightly into the muffin tins for the best shape and texture.
Key Technique for Perfect No-Bake Chocolate Oat Cups
The most important technique is to ensure thorough mixing of wet and dry ingredients for even distribution. This ensures that each cup is flavorful and has that perfect blend of textures.
No-Bake Chocolate Oat Cups
📋 Ingredients
Main Ingredients
- 1 cup butterRoom temperature
For the Sauce
- 2 cups rolled oatsFor the base
- 1 cup almond butterCreamy, natural
- 1/2 cup honeyOr maple syrup
- 1/2 cup cocoa powderUnsweetened
- 1/4 cup coconut flakesUnsweetened
- 1/2 cup dark chocolate chipsFor added richness
- 1 teaspoon vanilla extractFor flavor
- 1/4 teaspoon saltBalances sweetness
- 1/4 cup chia seedsFor added nutrition
- 1/4 cup nutsChopped, optional
- 1/4 cup dried fruitOptional for sweetness
- 1 tablespoon flaxseed mealOptional for fiber
Instructions
Prepare Ingredients
Gather all your ingredients and measure them out for easy mixing.
Mix Dry Ingredients
In a large bowl, combine the rolled oats, cocoa powder, chia seeds, and salt.
Combine Wet Ingredients
In another bowl, mix together almond butter, honey (or maple syrup), and vanilla extract until smooth.
Combine Mixtures
Pour the wet ingredients into the dry ingredients and mix until fully combined.
Add Chocolate Chips
Fold in the dark chocolate chips and any nuts or dried fruit if using.
Form the Cups
Line a muffin tin with cupcake liners and scoop the mixture into each liner, pressing firmly.
Chill the Cups
Place the muffin tin in the refrigerator for about 45 minutes to set.
Serve
Once set, remove the cups from the muffin tin and enjoy your delicious no-bake chocolate oat cups.
Recipe Notes & Tips
Storage Tips
Store the no-bake chocolate oat cups in an airtight container in the fridge. They can last up to a week if stored properly. You can also freeze them for longer storage.
Serving Suggestions
Serve these oat cups on their own or with a dollop of yogurt. They pair well with fresh fruit for added flavor and texture.
Recipe Variations
Feel free to customize these oat cups by adding different mix-ins like peanut butter, protein powder, or various seeds for a personalized touch.