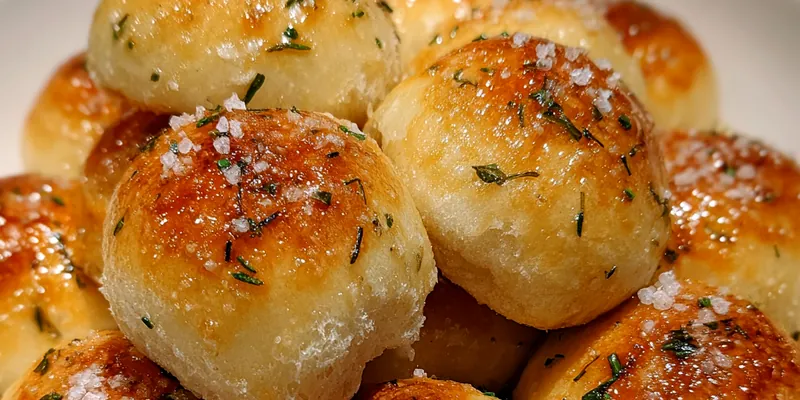
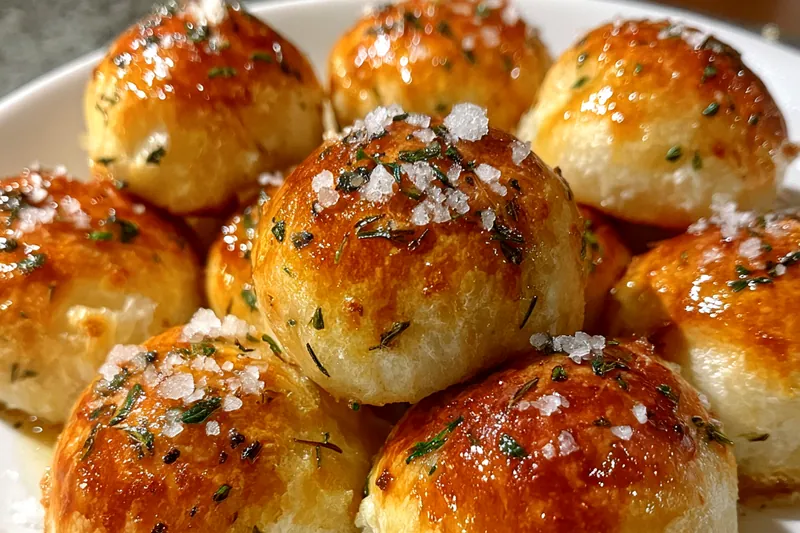
Herb Salted Garlic Rolls
These Herb Salted Garlic Rolls are the perfect blend of soft, fluffy dough and rich, savory flavors. Infused with garlic and fresh herbs, they make an irresistible appetizer. Serve them warm with butter, and watch them disappear!

Why This Herb Salted Garlic Rolls Recipe Works
This recipe stands out due to its perfect balance of flavors from the fresh herbs and garlic. Each roll is soft on the inside with a slightly crispy exterior, making them irresistible. They're also easy to make, allowing you to impress your guests without spending hours in the kitchen.
The technique of letting the dough rise twice ensures a light and airy texture. The addition of herbs and garlic in the filling elevates the flavor, making these rolls a delicious accompaniment to any meal.
💡 Professional Tip
For even more flavor, consider adding a sprinkle of sea salt on top before baking. This enhances the taste and gives a lovely texture to the rolls.
Frequently Asked Questions
Yes, you can prepare the dough in advance and store it in the refrigerator overnight. Allow it to come to room temperature before shaping the rolls. This makes it convenient for party planning.
If fresh herbs are unavailable, you can use dried herbs instead. Use about one-third of the amount of dried herbs compared to fresh, as they are more concentrated in flavor.
The rolls should have a golden brown color on the outside. You can also tap them lightly; if they sound hollow, they're likely done. An internal temperature of around 190°F (88°C) indicates they're fully baked.
Absolutely! After baking, allow the rolls to cool completely, then store them in an airtight container or freezer bag. They can be frozen for up to 3 months. Reheat them in the oven when you're ready to enjoy.
These rolls pair beautifully with marinara sauce, olive oil, or even a creamy dip. They also complement Italian dishes such as pasta or salad, adding a delightful touch.
When stored in an airtight container, these rolls can last in the fridge for about 3-4 days. Make sure to reheat them before serving for the best texture.
Yes, you can prepare the rolls up to the second rise and then refrigerate them. Just make sure to let them come to room temperature before baking.
The best way to reheat the rolls is in the oven at 350°F (175°C) for about 10-15 minutes. This helps restore their crispy exterior while keeping the inside soft.
Recipe Troubleshooting Guide
Too Dry
Problem: If the rolls turn out dry and crumbly.
Solution: Ensure not to over-knead the dough and check that it's properly hydrated. Adding a bit more water during mixing can help.
Not Crispy Enough
Problem: If the rolls lack a crispy exterior.
Solution: Try increasing the oven temperature slightly or placing a tray of water in the oven to create steam while baking.
Overcooked
Problem: If the rolls are too brown or hard.
Prevention: Keep an eye on them towards the end of the baking time. If they brown too quickly, cover them with foil until they are done.
Undercooked Center
Problem: If the centers of the rolls feel doughy.
Recovery: Bake the rolls for a few more minutes and check with a toothpick in the center to ensure they are fully cooked.
Burnt Exterior
Problem: If the outside of the rolls burns before the inside is cooked.
Prevention: Lower the oven temperature slightly and extend the baking time if necessary to cook through without burning.
Flavor Balance
Too Sweet: If the rolls are too sweet, reduce the sugar in the dough next time.
Too Salty: If they taste too salty, ensure to measure the salt carefully. You can add more herbs to balance the flavor.
Bland: If the rolls are bland, consider adding more garlic and herbs or a sprinkle of sea salt on top before baking.

Essential Ingredients for Herb Salted Garlic Rolls
The key ingredients in this recipe include all-purpose flour, warm water, and instant yeast. These form the base of the dough, providing structure and texture. Fresh garlic and herbs add layers of flavor, making these rolls truly special.
Quality ingredients make a significant difference in outcomes. Using fresh herbs and high-quality olive oil will enhance the flavors, ensuring your rolls are not only delicious but also aromatic.
Essential Ingredient Notes
- All-Purpose Flour: Using all-purpose flour gives these rolls the perfect structure. Make sure to measure accurately to achieve the right dough consistency.
- Fresh Garlic: Fresh garlic provides a strong, aromatic flavor. Avoid pre-minced varieties for the best taste; freshly minced garlic is more vibrant.
- Herbs: Fresh herbs like rosemary and parsley bring an aromatic touch. You can mix and match your favorite herbs to create a unique flavor profile.
Step-by-Step Cooking Process
The cooking method involves mixing, kneading, and allowing the dough to rise twice. This process develops gluten, giving the rolls their desired texture. Shaping and filling each roll with garlic and herbs adds flavor.
For perfect results, ensure to let the dough rise in a warm environment. An adequately kneaded dough will help achieve the fluffiness that everyone loves in rolls.
Key Technique for Perfect Herb Salted Garlic Rolls
The key to perfect Herb Salted Garlic Rolls lies in the double rise technique. This not only develops the flavor but also helps create a light and airy texture that is essential for soft rolls.
Herb Salted Garlic Rolls
📋 Ingredients
Main Ingredients
- 1 cup butterRoom temperature
- 3 cloves garlicMinced
- 1 teaspoon saltTo taste
- 1 tablespoon parsleyChopped
- 1 tablespoon Parmesan cheeseGrated
For the Sauce
- 2 cups all-purpose flourFor the dough
- 1 cup warm waterTo activate yeast
- 2 tablespoons olive oilFor flavor
- 1 tablespoon sugarTo feed the yeast
- 1 teaspoon saltFor seasoning
- 1 packet (2 1/4 tsp) instant yeastFor leavening
- 4 cloves garlicMinced
- 1 tablespoon fresh rosemaryChopped
Instructions
Prepare the Dough
In a large bowl, combine warm water, sugar, and yeast. Let it sit for 5 minutes until frothy. Add olive oil, salt, and half of the flour.
Mix and Knead
Gradually add the remaining flour and knead for 8-10 minutes until the dough is smooth and elastic.
Let it Rise
Place the dough in a greased bowl, cover with a damp cloth, and let it rise in a warm place for about 1 hour, or until doubled in size.
Prepare Filling
In a small bowl, mix minced garlic, herbs, Parmesan, and red pepper flakes.
Shape the Rolls
Once dough has risen, punch it down and divide into small pieces. Flatten each piece, add a spoonful of filling, and shape into rolls.
Second Rise
Place the shaped rolls on a baking sheet lined with parchment paper. Cover and let rise for another 30 minutes.
Preheat Oven
Preheat your oven to 375°F (190°C).
Bake the Rolls
Brush the rolls with melted butter and bake for 20-25 minutes until golden brown.
Serve Warm
Remove from oven, cool slightly, and serve warm with extra melted butter.
Recipe Notes & Tips
Storage Tips
Store leftover rolls in an airtight container at room temperature for up to 3 days. For longer storage, refrigerate them, and reheat before serving for the best texture.
Serving Suggestions
These Herb Salted Garlic Rolls are best enjoyed warm. Serve them alongside marinara sauce, olive oil, or a fresh salad to complement their flavors.
Recipe Variations
For a twist, try adding different cheeses like mozzarella or switching out the herbs for basil or thyme. You can also make them into sliders by adding your favorite fillings.